Easy Pot Roast

Some people brown their meat in oil before roasting it to give it a nice brown color. That's too hard. This recipe let's you skip that.
Easy Pot Roast
Serves 8

  • 1 5-pound beef chuck roast
  • One envelope French onion mix (I use Simply Organic)
  • 1 cup water
  • 4 onions, peeled and quarted
  • 2 pounds carrots, cut into desired size
  • 2 pounds potatoes, peeled
  • Frozen green beans (optional)
Preheat oven to 325.

In a large roasting pan with a lid, place potatoes and carrots. Add green beans. Dot with onions. Add one cup of water. Place meat on top of vegetables. Sprinkle French onion mix over meat. Cover. Roast for 4 hours. At 350, roast for 3 hours.

Overripe Cantaloupe

Smoothies are great for undesirables.

Cantaloupe Smoothie
Serve 2

1 cup orange juice
1 cup cubed cantaloupe
1 cup ice


Blend until smooth. Sweeten if desired.

A Work of Art

This airplane cake is a masterpiece. My contribution? I baked the cake using old stale flour. You're welcome. Great job J. Happy 4th birthday SW.

Airplane Cake
From parenting.com

Ingredients:

  • 4 graham crackers
  • 1 (16 oz) family-size frozen pound cake (Sara Lee) (I made my own. See below.)
  • 1 can (16 oz) vanilla frosting (I made my own.)
  • 1 cup white chocolate chips
  • 1 Tbsp vegetable shortening (Crisco)
  • ½ cup coarse white decorating sugar
  • 8 red Jolly Rancher fruit chews (We used fruit roll ups.)
  • 8 blue Jolly Rancher fruit chews (We used fruit roll ups.)
  • 8 large marshmallows
  • 5 Kids Cones miniature wafer ice cream cones
  • 4 yellow Jelly Belly Mint Cremes (We used yellow Melty Mints from Walmart.)
  • 1 cup blue decorating sugar, optional

What you'll need:

  • A serving platter
  • A serrated knife
  • A baking sheet
  • Waxed paper
  • A resealable sandwich-size plastic bag
  • Small and medium star-shaped cookie cutters
  • A paring knife

Trimming the cake:

  1. Place the cake on a clean work surface. Trim the cake according to template. Save one large piece as the cockpit of the plane.
  2. Round the sharp edges of the cake sides and ends with a small knife.
  3. Cut the graham crackers following templates for the wings and tail of plane.

Preparing the decorations:

  1. Line a baking sheet with waxed paper.
  2. Microwave the white chocolate chips and shortening, about 30 seconds, and stir until smooth. Spread both sides of the graham crackers with a thin layer of melted white chocolate. Sprinkle both sides with the white decorating sugar to coat. Place on the prepared baking sheet and refrigerate until set, about 5 minutes.
  3. Unwrap the red fruit chews and microwave for no more than 3 seconds. Press 3 red fruit chews together and roll out to a 1 ½-inch by 6-inch rectangle. Roll out and flatten the remaining 5 red fruit chews and cut out the remaining shapes - two trimmings for the tail wings, two small stars for the tail fin, two medium stars for the wings (see photo).
  4. Unwrap the blue fruit chews and microwave for no more than 3 seconds. Press the 8 blue fruit chews together, roll out and flatten them. Cut out eight ovals to use as the airplane's windows. Cut a small rectangle and two small triangles for the airplane's front windows, as pictured. Set aside.

Frosting the cake:

  1. Spoon ½ cup of the vanilla frosting into a resealable bag. Set aside.
  2. Place the airplane cake base on a serving platter large enough for the wings and tail.
  3. Place one of the trimmed pieces on top of the larger end of the airplane body and attach with some of the vanilla frosting.
  4. Spread the remaining vanilla frosting over the cake to cover completely. Make smooth.

To complete the decoration:

  1. Cut 4 marshmallows down to fit into 4 of the Kids Cones. Snip a small corner from the bag of vanilla frosting. Pipe a dot of vanilla frosting onto the marshmallow and attach the yellow Mint Creme to the open end of cone.
  2. Trim 1 inch from the base of the remaining Kids Cone and attach to the back of the cake for the tail exhaust.
  3. Using some of the vanilla frosting, secure 2 of the Kids Cones on each side of the plane to support the wings.
  4. Pipe some of the vanilla frosting on top of the cones and attach the large graham cracker wings. Pipe some decorative frosting around edge of the wing where the wings touch the airplane's body to secure.
  5. Place a marshmallow on either side of the back of the plane to use as a support for the tail wings. Place the tail wings on top and secure by piping on a decorative line of frosting.
  6. Press the top tail fin into the top of the cake as pictured and pipe more frosting around the base to secure.
  7. Add the red and blue fruit chew decorations as pictured, piping frosting on as necessary to secure.
  8. Sprinkle the serving platter with blue decorating sugar to cover. Cut the remaining marshmallows into thirds, crosswise. Overlap the slices slightly to make clouds and place in the blue sugar, as pictured.

Cake Anatomy:

Airplane cake anatomy

Cake Cutout:

airplane cutout
Vanilla Cream Cheese Pound Cake
Adapted from Rosie's Bakery
Makes 2 loaves. One for the airplane and an extra one for those who prefer no frosting. Or just in case you mess up on the first cake. Like I would. Which is why I didn't create it.

Cake
3 cups flour
3 sticks (1 1/2 c.) butter, at room temperature
1 package (8 oz) cream cheese, at room temperature or warmed lightly in a microwave
3 cups sugar
1 T vanilla extract
6 large eggs, at room temperature

Optional Glaze for Extra Cake
1 cup confectioner's sugar
2 1/4 t. vanilla extract
2 T hot water


1. Preheat the oven to 325 degrees. Lightly grease 2 loaf pans with butter or vegetable oil.
2. Sift the flour into a small bowl and set aside.
3. Cream the butter, cream cheese, sugar, and almond extract in a medium-size mixing bowl with the mixer on medium-high speed until light and fluffy, about 2 minutes. Stop the mixer once or twice to scrape the bowl with a rubber spatula.
4. Add eggs one at a time to the butter mixture and mix on medium speed after each addition until blended, about 10 seconds. Scrape the bowl each time. When all the eggs are added, mix 30 seconds more.
5. Stir the flour gently into the batter with a rubber spatula. Then mix on low speed 5 seconds, scrape the bowl, and blend until the batter is smooth and even, 5 to 10 seconds.
6. Pour the batter into the prepared pans. Bake the cakes at the same time on the center oven rack until golden and firm to the touch, and a tester inserted in the center comes out dry, about 1 hour 35 minutes.
7. Allow the cakes to cool completely in the pan before unmolding! Feel free to pick off and eat the crusty tops. But don't mangle it too much.
8. Prepare the glaze: Stir the confectioner's sugar, vanilla extract, and water together in a small bowl with a small whisk until the sugar is completely dissolved. (Add more sugar if thicker glaze is desired.)
9. Remove the cake from the pan. Use one for the airplane cake. Place the extra cake on a cookie sheet. Pour the glaze over the extra cake slowly so that it covers the top and drips down the sides. When the glaze hardens, transfer the cake to a pretty serving plate.

Fresh Zucchini

Use shredded zucchini like shredded lettuce. Like in tacos or sandwiches. If you pick your zucchini before it grows into Godzilla, you will get more. Is that good?

Is That Applesauce?

No. It's pineapple.

That's too brown to be pineapple.

That's why I am making this.

 
Pineapple Upside-Down Biscuits
From thepioneerwoman.com *
Serves 10

Ingredients

  • Pineapple
  • 3/4 cups packed brown sugar
  • 3 tablespoons Butter
  • 1-1/2 cup chopped fresh pineapple (I used my canned brown crushed pineapple, drained.)

  • Biscuits (I used some expired canned Simply buttermilk biscuits.)
  • 2 cups flour
  • 2 teaspoons baking powder
  • 1/4 teaspoon baking soda
  • 1 teaspoon sugar
  • 3/4 teaspoons salt
  • 3/4 sticks (6 tablespoons) butter, frozen
  • 1 cup buttermilk, plus extra if necessary

Preparation Instructions

*From "Perfect One Dish Dinners" by Pam Anderson.
Adjust oven rack to middle position and heat oven to 450 degrees.
Pineapple: Heat brown sugar and 3 tablespoons butter in a small saucepan over medium heat to a spreadable consistency. Pour into a 9-inch round cake pan, tilting to coat pan bottom; top with pineapple.
Biscuits: Mix flour, baking powder, baking soda, sugar, and salt with a fork in a medium bowl. Using a box grater, coarsely grate frozen butter into dry ingredients, mixing quickly with fingertips to evenly blend. Stir in buttermilk with a fork, adding extra droplets of buttermilk over any dry patches, if necessary and mix until dough just comes together.
Turn dough onto a floured surface. With your fingers, pinch dough into 10 rough rounds and arrange over pineapple. Bake until biscuits are golden brown and pineapple topping is bubbly, about 20 minutes. Invert onto a serving plate and serve immediately with vanilla ice cream or freshly whipped cream. Or creme fraiche. Or quark.
After 20 min of baking my biscuits were still doughy in the middle. It may have been because of all the juice from the crushed pineapple. I covered the biscuits with foil to prevent further browning and baked it for another 10-15 min.
Posted by on May 15 2011

Mr. Wood E. Chuck

He is a hog. That lives in the ground. And loves bean plants.

Beef, It's What's for Dinner

OK and some things with it like very stale pasta, old sauce and moldy cheese.
Baked Tri Color Rotini
Adapted from epicurious.com
Serves Many! Like 20-24. Of big pieces. Adjust as needed.

3 pounds ground beef
2 pounds mozzarella cheese
3 pounds tri color rotini
3 1/2 quarts of marinara sauce
Salt
Pepper
Oregano

Brown the ground beef, breaking into crumbles. Season with salt, pepper and oregano. Drain if desired. Add sauce to meat and heat. Cook pasta according to directions.

Preheat oven to 350.

Drain the pasta when done. In a very large bowl or pan mix the meat, sauce and pasta. Spoon into a very large baking pan or casserole dish sprayed with Pam for good luck. I had to use a roasting pan there was so much pasta to get rid of. Big Blue in fact. Yep, it has a name. Anything that large desires a name. Top with cheese and bake at 350 until the cheese is melted and the sauce is bubbly, about 30 minutes. Allow to sit for 5 minutes before serving.

Ah, My Proud Beauty

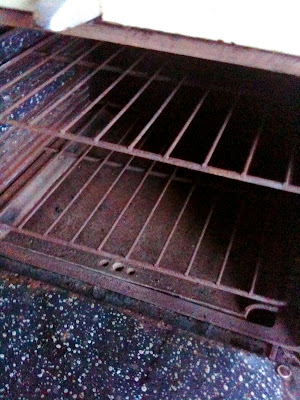
This is the ultimate "it's still good." I have made my family save this 465 pound beast from the 1920's for almost 40 years. My grandmother, who cooked on it, would look at it and say, "Ah, my proud beauty." I had it restored and put it in my new kitchen. I hope I like it.

Model A Chamber's Stove in buttercup yellow


Before:


After:

Raspberry Ganache Torte

From Le Cakery. With coupons it only cost me 5 dollars. Mmmmmm.

My Counter

This is most of the stuff that I cannot get into my refrigerator at my new location. I wonder how long will the jam and pickle relish will last? I did throw out last Thanksgiving's cranberry sauce. It got moldy sitting on the counter.

My Dream Fridge

We are in the middle of moving and I had to clean out my refrigerator. Sigh. Due to my procrastination, which provides fodder for this place, I was forced to throw out much food that could have been turned into something delicious. Double sigh.